Having told a number of people I will be running batik classes, I am often asked “So, what is batik?”. This article aims to explain the process step-by-step, using a project I will be teaching to beginners to decorate their initial.
In a nutshell, batik is an ancient craft used mainly in Indonesia, Africa, India and Japan using hot wax and dyes to create pattern, motifs or paintings usually on fabric. Beginning with a blank canvas, a design or motif is drawn using a special tool called a tjanting which is dipped into hot wax. The tjanting has a reservoir to hold the hot wax and a spout with which to draw on the fabric by passing the spout over the cloth. Also, metal stamps called tjaps are used that can be dipped in to the wax and transferred on to the fabric to create a repeat pattern. The type of batik I am most familiar with is Batik Tulis, which in Indonesia means hand written or hand drawn batik and is the method I am explaining here.
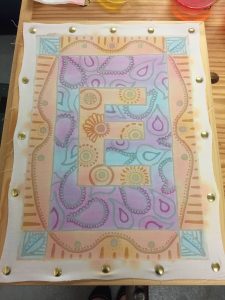
Batik is a process of layering and saving. With each layer of colour the question to ask is “Which bit of the current layer of colour do I wish to save?” Where the wax is applied, it saves that current colour. When picturing an artwork in the mind, the execution of it in Batik comes about through an almost a reverse method of thinking. So here, I began with a blank white cotton fabric and using the tjanting I drew the outline of the letter and the border lines on to the white cloth. The first application of wax saved the line work as white. I then added some weak pastel shades of dye. This will add visual impact later as multiple layers build one on top of the other.
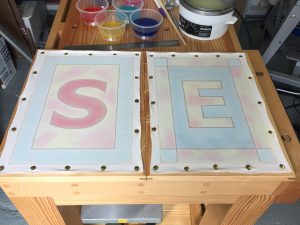
In traditional batik the fabric is often immersed entirely in a vat of dye colouring the whole cloth each time. Any waxed areas would resist the dye, hence why batik is often know as a resist medium. Here, rather than immersing I have painted the dyes on to isolated areas, stippling in places for different affects. Once dried, the next act of ‘saving’ can be carried out, shown here in step 2:
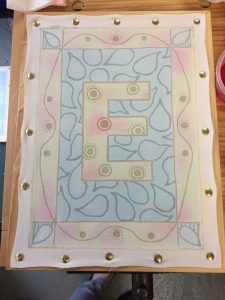
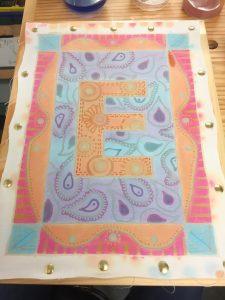
Using the Batik Tulis method, I have free hand drawn the beginnings of a paisley background and the border infill. The additional wax added in step 2 saved parts of the pastel blue background and the pastel coloured border.
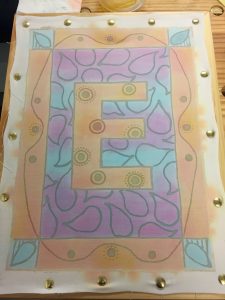
In step 3, I strengthened the solution of the dyes and added another layer of colour, this time alternating stripes of purple and blue in the paisley background and using a block salmon coloured dye on the border, and a deeper turquoise in the corners.
Step 4 shows a further waxing which saved alternating waves of blue and purple and parts of the border with indents and dots. The ‘tik’ in the word Batik means to dot! The wax dries very quickly but the dye can take much longer.
Step 5 shows the addition of pink dye in the border on top of the previous waxing and colours, and I darkened the salmon to a more intense rust brown colour. I also ran a straight wash of turquoise over the whole background but it doesn’t really show up too well here. In step 6, I added further waxing decoration to the ‘E’ and the paisley centres.
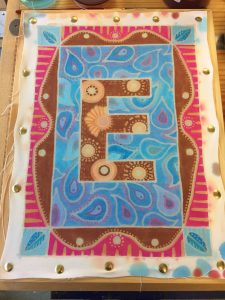
Finally in step 7, I added a deep rust brown and discriminately over-painted parts of the blue paisley background with a strong mix of turquoise dye, deliberately choosing to leave certain parts lighter. I added some punch with the deeper coloured leaves in the border corners, and once again painted over the cerise pink of the border to elevate the whole piece. It’s joyous moment when the dynamism of the piece pops in to life, and then I knew it was done!
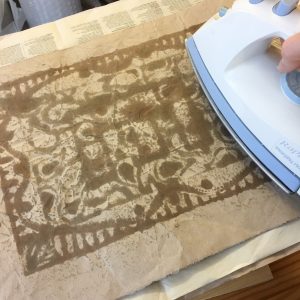
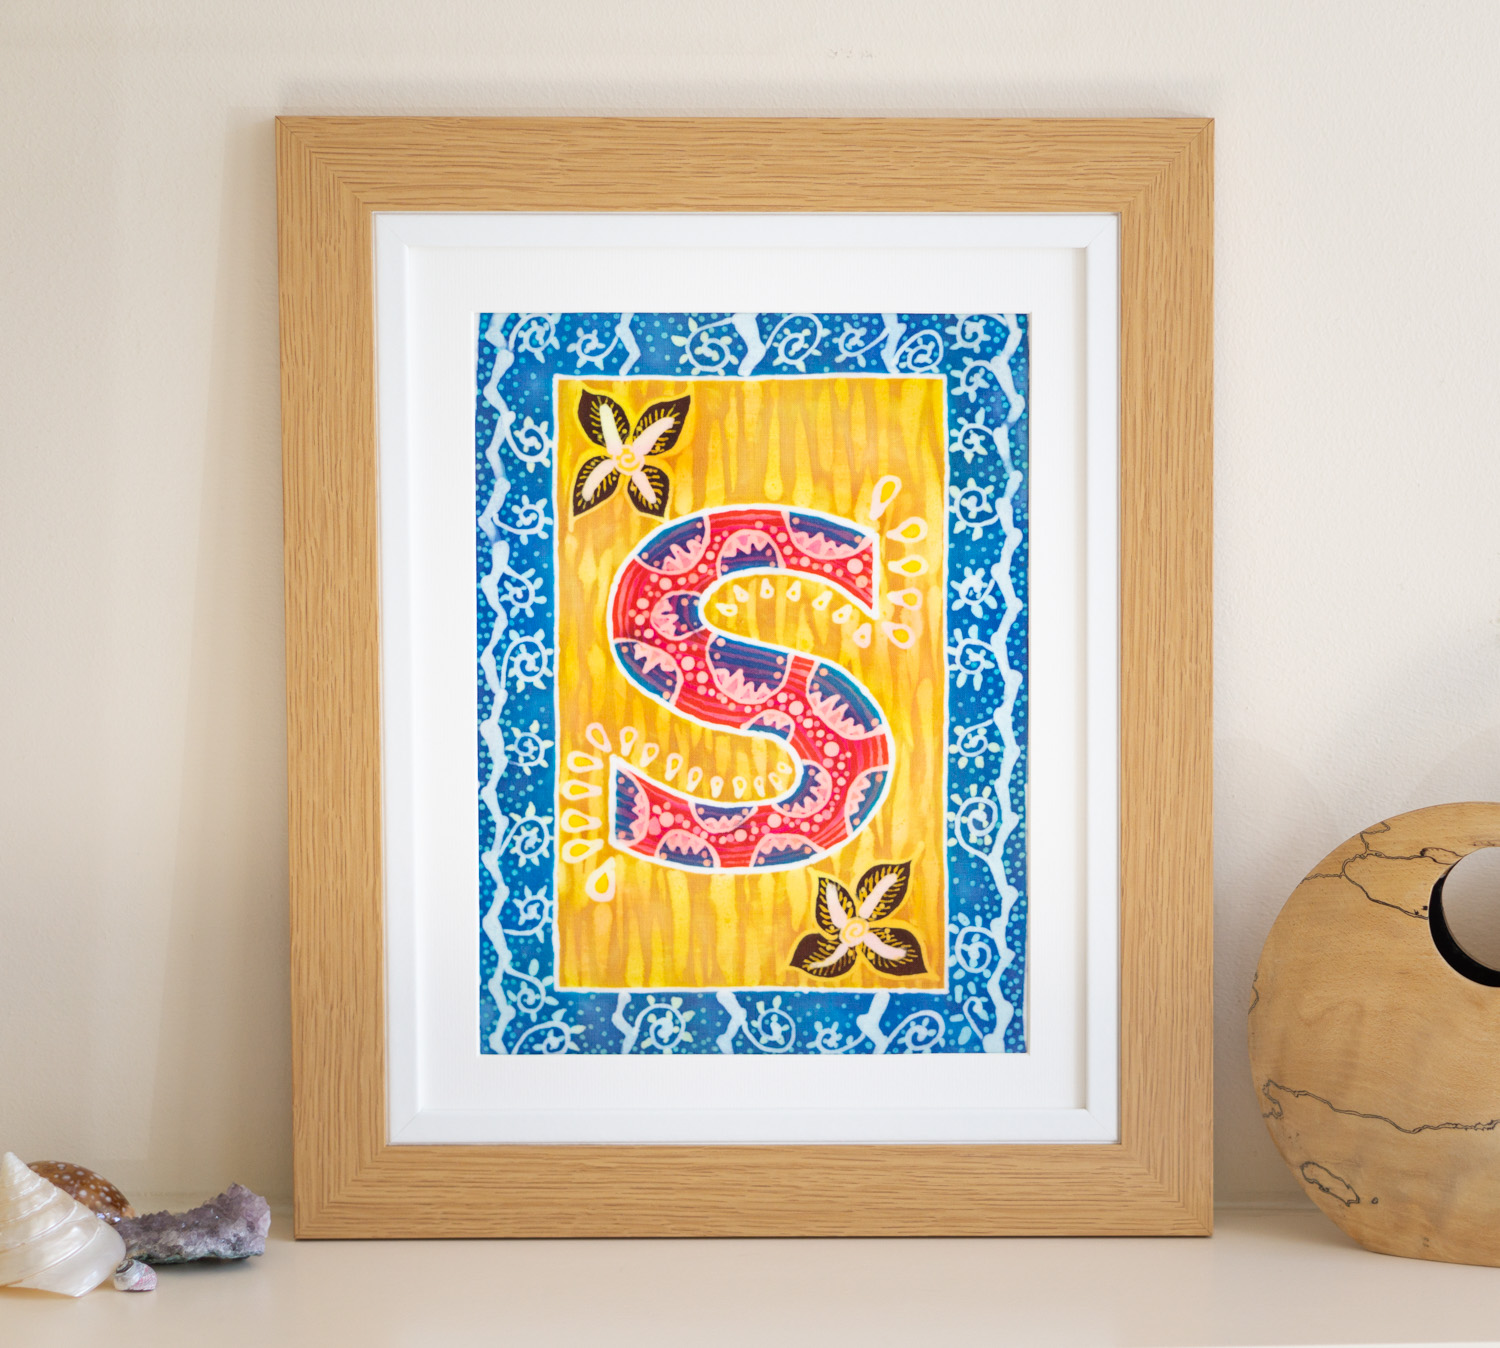
Once the completed piece had dried it was removed from the frame and sandwiched between several sheets of brown paper/old newsprint to iron the wax off. The iron should be set to a medium heat to ensure absorption of the wax in to the paper but not too hot as it can burn the fabric. Unless the fabric is washed in a special detergent a wax residue will remain in the fabric. For a wall hanging this is fine and I quite like it as it intensifies the colours and can leave a halo which highlights the forms. But for clothing or soft furnishings however, the wax will need fully removing.
To fully compliment the work, frame it and show it! You can see how a mount and picture frame really tops off a finished piece 🙂
Voila!!